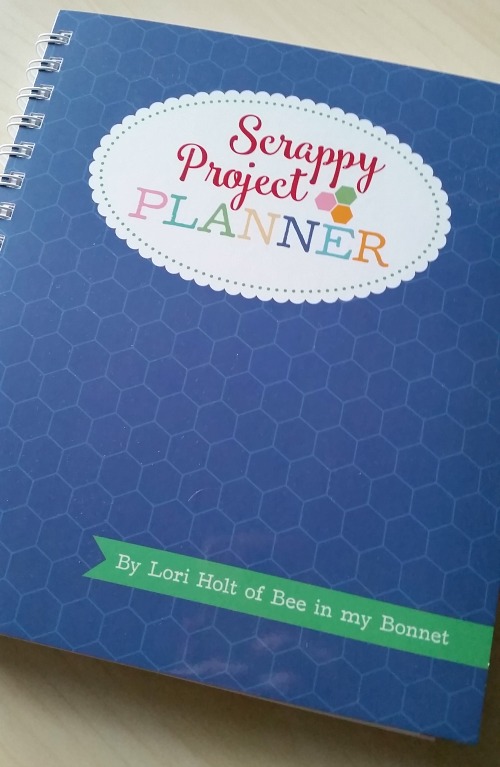
Hey y'all! I'm back with another fun little block to share! Remember, a couple of posts ago, I shared a picture of how I was keeping my Bella colours organized using my Scrappy Project Planner? Well, here's another fun thing about this planner - it includes scrappy quilt projects too! FQS has decided to tackle each of these scrappy blocks and asked if I'd like to sew along too and, of course, I said yes! My block is the Patchwork Tulip.
For fun, I went a little crazy with my colour choices! For the tulip head, I selected various shades of dark purple and raspberry, and two grades of orange for the stem. The Tula Pink fabric I used for the leaves, actually contains some of the same dark purple and raspberry shades so I thought it was a fun pairing. I chose three different white-on-white neutrals for the background fabrics.
This block came together very quickly without a lot of fuss. I loved being able to dive into my scrap bin to select some much loved scraps for this one.
You can find the Scrappy Project Journal on the Fat Quarter Shop website. I've never been very good at keeping track of my projects and planning things out ahead of time, but I've enjoyed using this so far for the Bella Skill Builder.
Showing posts with label Scrappy. Show all posts
Friday, February 17, 2017
Monday, September 9, 2013
Tutorial: Welcome to the Neighbourhood
Hey y'all! Things have been quiet around these parts lately but that's because I'm in the middle of getting everything ready for the EPP class I'm teaching at Sewing Summit - I cannot believe that it's only 10 days away. I'm so excited! But let's not talk about that right now, let's get onto a fun, new tutorial - woot!
I received these lovely fabrics in the mail a couple of weeks ago from Liberty of London and Sew, Mama, Sew. These fabrics are from the Stile collection by Liberty Art Fabrics and they are lovely! You would not believe how excited I was to receive a package marked with the Liberty logo in the mail - I've never been able to buy anything directly from Liberty, so it was quite a treat! Now why, you may ask, would Liberty and SMS possibly send me these beauties? To take part in a super-fun pillow challenge of course! And, because I'm me and I love to write patterns, I decided to turn the challenge into a tutorial - woot!
Introducing... Welcome to the Neighbourhood! This little pillow uses all 8 of the Liberty prints I was sent, plus a few solids, to create a little gathering of sketchy applique houses! This tutorial is more about the applique than the specific dimensions of the pillow itself so you can feel free to make it any size you'd like (mine is about 9x13"). So let's go!
Materials:
-Scraps (prints and solids) for the houses
-Linen background fabric
-Black thread
-Heat and Bond (or other paper-backed fusible web)
-Template
Directions:
Print off the houses template (print at 100% without scaling). Using your fusible web, trace each piece from the template onto the paper side.
Cut out the templates from the fusible web, leaving a little bit of room around each template. Label each template so that alignment and fabric selection is easier.
Following the directions for your specific web, steam the template (glue-side down) to the wrong side of your fabric.
Cut out each template along your tracing lines.
Peel off the paper backings and decide on the placement of your pieces against the linen background fabric - as you can see from the picture above, the roof overlaps the chimneys and a teeny bit of the body of the house. Follow the directions for your fusible web to fuse them into place.
Repeat the above with the window and door pieces. Fuse into place.
Now here's where we get to the fun sketchy bit! Using your black thread, stitch around all of the pieces that you've fused. This is supposed to look sketchy and slightly uneven - try not to get hung up on perfection here! It's all part of the fun! Make sure to go around each bit so that they are permanently stitched down.
As you can see, after I finished sketchy-stitching my bits down, I added another strip of Liberty fabric across the top to resemble the sky. I also added some sketchy wisps out of the chimneys, and hand stitched a french knot onto each door for a door knob.
I finished off the pillow by stitching a piece of cotton batting to the wrong side of both the front and back pieces of the pillow to give it a little loft. I used another Liberty print on the back (and for the label) and did a simple turned finish.
I hope you like my little tutorial and that it inspires you to try some sketchy applique - it's quite fast and fun! If you do end up using the Welcome to the Neighbourhood templates or tutorial, I would love to see it! Either share it in my Flickr group or feel free to drop me a line!
Thanks so much to both Liberty of London for the fabrics and to the entire Sew, Mama, Sew team for putting this challenge together - I sure had a good time!
I received these lovely fabrics in the mail a couple of weeks ago from Liberty of London and Sew, Mama, Sew. These fabrics are from the Stile collection by Liberty Art Fabrics and they are lovely! You would not believe how excited I was to receive a package marked with the Liberty logo in the mail - I've never been able to buy anything directly from Liberty, so it was quite a treat! Now why, you may ask, would Liberty and SMS possibly send me these beauties? To take part in a super-fun pillow challenge of course! And, because I'm me and I love to write patterns, I decided to turn the challenge into a tutorial - woot!
Introducing... Welcome to the Neighbourhood! This little pillow uses all 8 of the Liberty prints I was sent, plus a few solids, to create a little gathering of sketchy applique houses! This tutorial is more about the applique than the specific dimensions of the pillow itself so you can feel free to make it any size you'd like (mine is about 9x13"). So let's go!
Materials:
-Scraps (prints and solids) for the houses
-Linen background fabric
-Black thread
-Heat and Bond (or other paper-backed fusible web)
-Template
Directions:
Print off the houses template (print at 100% without scaling). Using your fusible web, trace each piece from the template onto the paper side.
Cut out the templates from the fusible web, leaving a little bit of room around each template. Label each template so that alignment and fabric selection is easier.
Following the directions for your specific web, steam the template (glue-side down) to the wrong side of your fabric.
Cut out each template along your tracing lines.
Peel off the paper backings and decide on the placement of your pieces against the linen background fabric - as you can see from the picture above, the roof overlaps the chimneys and a teeny bit of the body of the house. Follow the directions for your fusible web to fuse them into place.
Repeat the above with the window and door pieces. Fuse into place.
Now here's where we get to the fun sketchy bit! Using your black thread, stitch around all of the pieces that you've fused. This is supposed to look sketchy and slightly uneven - try not to get hung up on perfection here! It's all part of the fun! Make sure to go around each bit so that they are permanently stitched down.
As you can see, after I finished sketchy-stitching my bits down, I added another strip of Liberty fabric across the top to resemble the sky. I also added some sketchy wisps out of the chimneys, and hand stitched a french knot onto each door for a door knob.
I finished off the pillow by stitching a piece of cotton batting to the wrong side of both the front and back pieces of the pillow to give it a little loft. I used another Liberty print on the back (and for the label) and did a simple turned finish.
Thanks so much to both Liberty of London for the fabrics and to the entire Sew, Mama, Sew team for putting this challenge together - I sure had a good time!
Wednesday, March 20, 2013
Be bold, be bold, and everywhere be bold. -Herbert Spencer
Hey y'all! So I'm still settling in at my new job and getting used to my new schedule (the time change helped nothing here!) and I've been having a really hard time fitting crafting into my life right now. With the travel to and from work I'm out of the house for 10 to 11 hours a day and frankly, I am just exhausted by the end of it. It's been really not fun, and I know that it will become easier once I get used to it again, but does anyone have any suggestions in the mean time? How do you fit crafting into your already full life?
I did manage to get a bit of sewing done on Saturday since I needed to finish a birthday present for my friend Kim. I decided to make her a pillow and thought that it would be an excellent chance to try making some X and + blocks which have been all over Instagram lately.
The finished pillow was made to fit an 18" square pillow form so I made 4 blocks (which finish at 7.5") and then added a border. The pillow has an envelope back and I used my Not Your Traditional Log Cabin Pillow tutorial from Sew, Mama, Sew to figure out all of my measurements. Since I wasn't quilting the pillow front this time around I added a piece of canvas the same size to give it a little more stability and to cover up the patchwork seams on the inside.
I used a bunch of different fabrics for this one and I just love the look! For the background of each block I used either the grey or white "sewing guide" print from Mama Said Sew; the added border around the blocks is black & white Sketch.
Most of the printed fabrics come from scrap bags I bought at The Workroom - I have blues, purples, and yellows (I also have greys but I didn't use any here). And I love how scrappy and fun it is! For the squares at the bottoms, tops, and sides of each plus I used a black and white print to set off the colours and bring everything together. I'm pretty happy with the way it turned out and I think Kim is too!
I've got a couple of other backlogged projects to share but I'll wait for another blog post. But seriously, if anyone has any suggestions for crafting with limited time or for getting used to a new schedule, let me know!
I did manage to get a bit of sewing done on Saturday since I needed to finish a birthday present for my friend Kim. I decided to make her a pillow and thought that it would be an excellent chance to try making some X and + blocks which have been all over Instagram lately.
The finished pillow was made to fit an 18" square pillow form so I made 4 blocks (which finish at 7.5") and then added a border. The pillow has an envelope back and I used my Not Your Traditional Log Cabin Pillow tutorial from Sew, Mama, Sew to figure out all of my measurements. Since I wasn't quilting the pillow front this time around I added a piece of canvas the same size to give it a little more stability and to cover up the patchwork seams on the inside.
I used a bunch of different fabrics for this one and I just love the look! For the background of each block I used either the grey or white "sewing guide" print from Mama Said Sew; the added border around the blocks is black & white Sketch.
Most of the printed fabrics come from scrap bags I bought at The Workroom - I have blues, purples, and yellows (I also have greys but I didn't use any here). And I love how scrappy and fun it is! For the squares at the bottoms, tops, and sides of each plus I used a black and white print to set off the colours and bring everything together. I'm pretty happy with the way it turned out and I think Kim is too!
I've got a couple of other backlogged projects to share but I'll wait for another blog post. But seriously, if anyone has any suggestions for crafting with limited time or for getting used to a new schedule, let me know!
Subscribe to:
Posts (Atom)